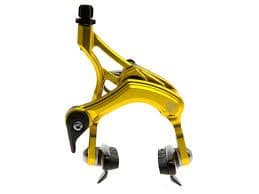
Align Your Bike Brakes for Safe Rides
Riding a bicycle is not just about pedaling and steering. The ability to stop safely and effectively is paramount, which is why the alignment of your bicycle brakes is crucial. Properly aligned brakes ensure not only your safety but also the longevity of your bike's components. In this article, we'll explore the importance of aligning your bicycle brakes correctly and provide a step-by-step guide on how to adjust them for optimal performance.
Why is Proper Brake Alignment Important?
Safety
The primary reason for ensuring your brakes are correctly aligned is safety. Misaligned brakes can lead to uneven braking power, which might cause the bike to veer to one side unexpectedly or increase stopping distances. In emergency situations, this could result in accidents.
Wear and Tear
Incorrectly aligned brakes can cause uneven wear on the brake pads and rims (or disc brake rotors), leading to premature replacement and potential damage to other components.
Performance
Well-aligned brakes provide smooth, efficient stopping power, enhancing your overall riding experience. They allow for precise modulation and control, which is especially important when navigating through traffic, descending steep hills, or during wet conditions.
How to Align Your Bicycle Brakes
Tools You'll Need:
- Allen keys or a wrench (depending on your brake system)
- Screwdriver (for some brake types)
Step 1: Identify Your Brake Type
Bicycles come with various types of brakes, including rim brakes (V-brakes, cantilever, caliper) and disc brakes. The adjustment process varies slightly between them, so it's important to know which type you're working with.
Step 2: Centering the Brake Calipers or Pads
For rim brakes, ensure the brake pads are centered on the rim. Loosen the bolt that holds the brake arm to the frame or fork just enough so you can manually center it, then retighten.
For disc brakes, if the caliper is misaligned, loosen the bolts that attach it to the frame or fork, squeeze the brake lever to center the caliper over the rotor, and retighten the bolts.
Step 3: Adjusting Brake Pad Clearance
For both rim and disc brakes, you'll want to adjust the clearance between the brake pads and the braking surface. This is usually done via a barrel adjuster located either on the brake lever or the brake caliper itself. Turn the adjuster to achieve a small, even gap (about 1-3mm) between each pad and the rim or rotor.
Step 4: Fine-Tuning
After adjusting the clearance, spin the wheel to check for any rubbing. If you hear scraping, or the wheel doesn't spin freely, you may need to readjust. For rim brakes, ensure the pads are not touching the tire or missing the rim. For disc brakes, ensure the rotor isn't bent and is passing evenly between the pads.
Step 5: Test Ride
Always take a test ride in a safe area after making adjustments. Check that the brakes engage smoothly and evenly without any unusual noises.
Conclusion
Correctly aligning your bicycle brakes is a straightforward but essential maintenance task that significantly impacts your safety and riding experience. By following these steps, you can ensure your brakes are in top condition, giving you confidence and control on your rides. Remember, regular maintenance is key to bicycle safety and performance, so make it a habit to check your brakes before every ride.
